Delete PDFCreator - Clean PDFCreator uninstall
The PDFCreator software can be deleted from Windows 10 and older by uninstalling it. For this, the PDFCreator is only delivered with a so-called uninstaller. There are two ways to run the uninstallation program, and the PDFCreator can be uninstalled properly.
Delete PDFCreator directly using Uninstaller.exe
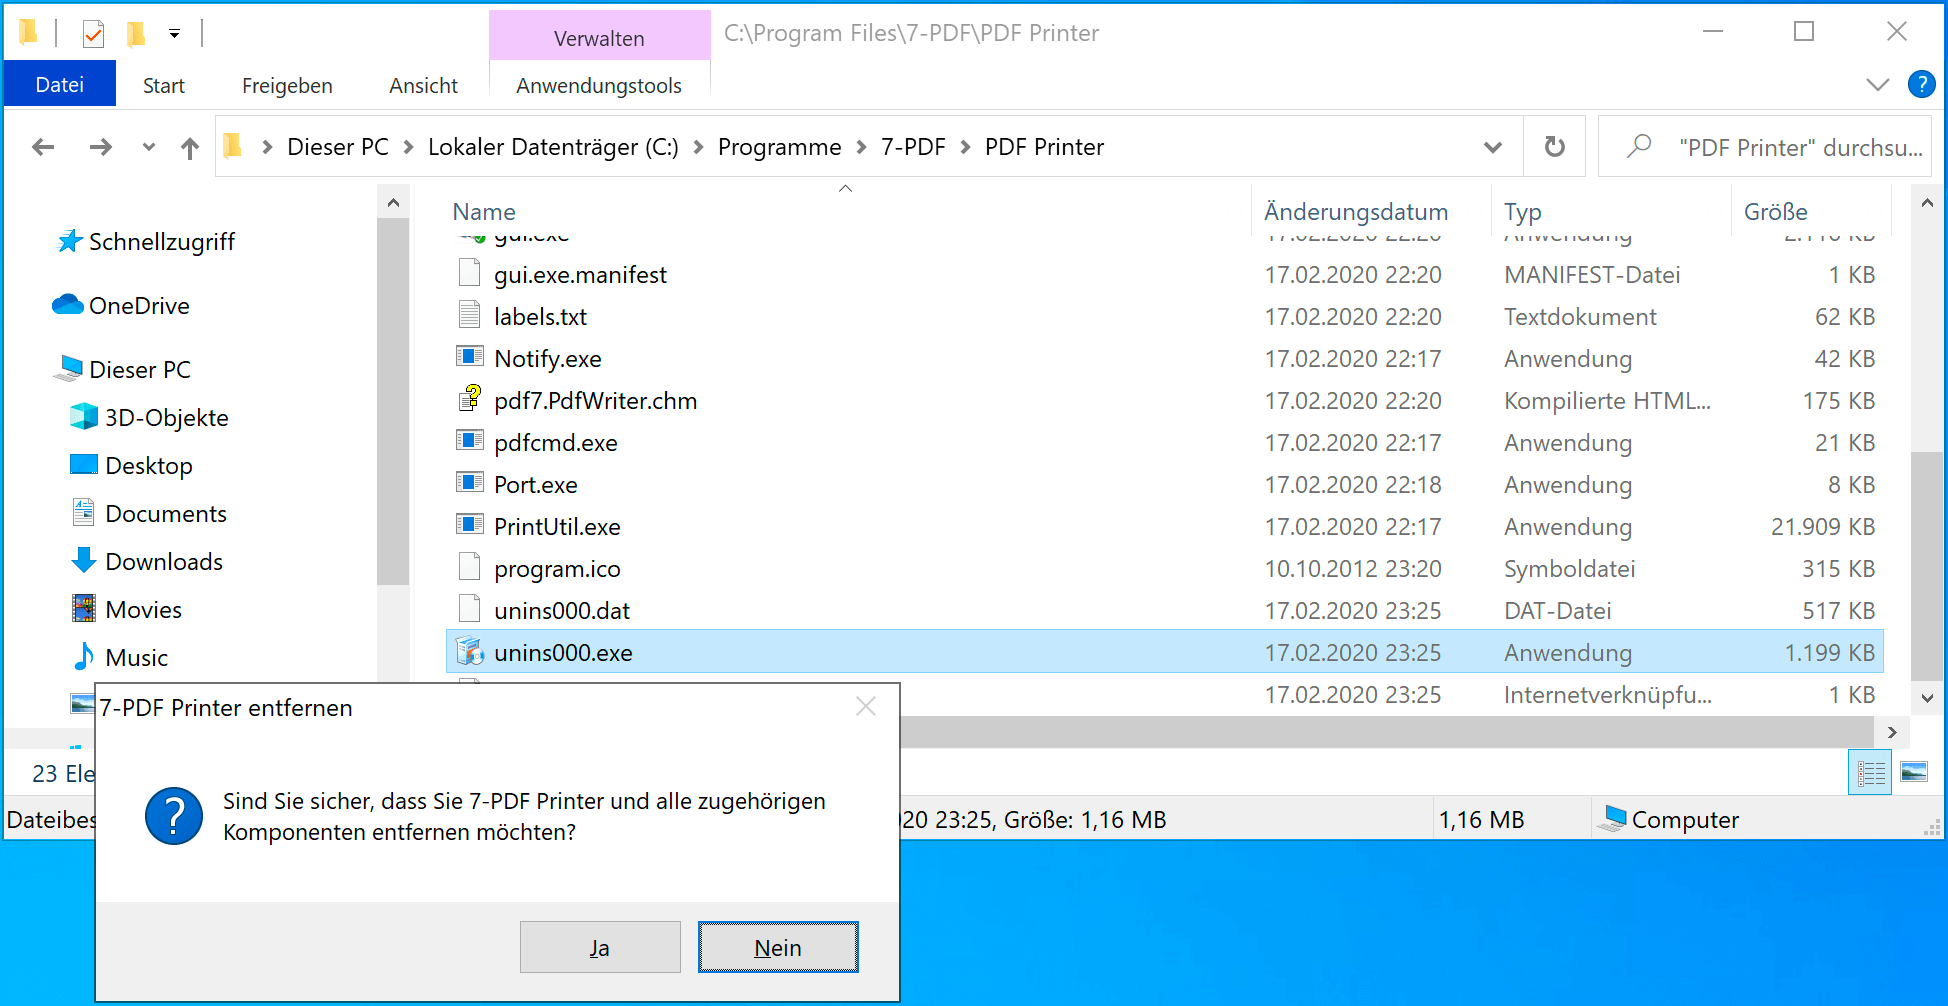
Use Windows Explorer and change to the installation directory of the PDFCreator, directly under C:\Program Files\7-PDF\PDF Printer, as shown in the screenshot.
Then simply double-click on the executable „unins000.exe“ located in the installation directory. This will start the PDFCreator uninstallation program. As in the screenshot, a dialog box appears asking you whether you really want to uninstall the PDF printer. If you click „Yes“, the PDFCreator will be deleted from Windows.

Illustration: Double-clicking on „unins000.exe“ starts the uninstallation of the PDFCreator.
Uninstall PDFCreator using the Control Panel under „Programs and Features“
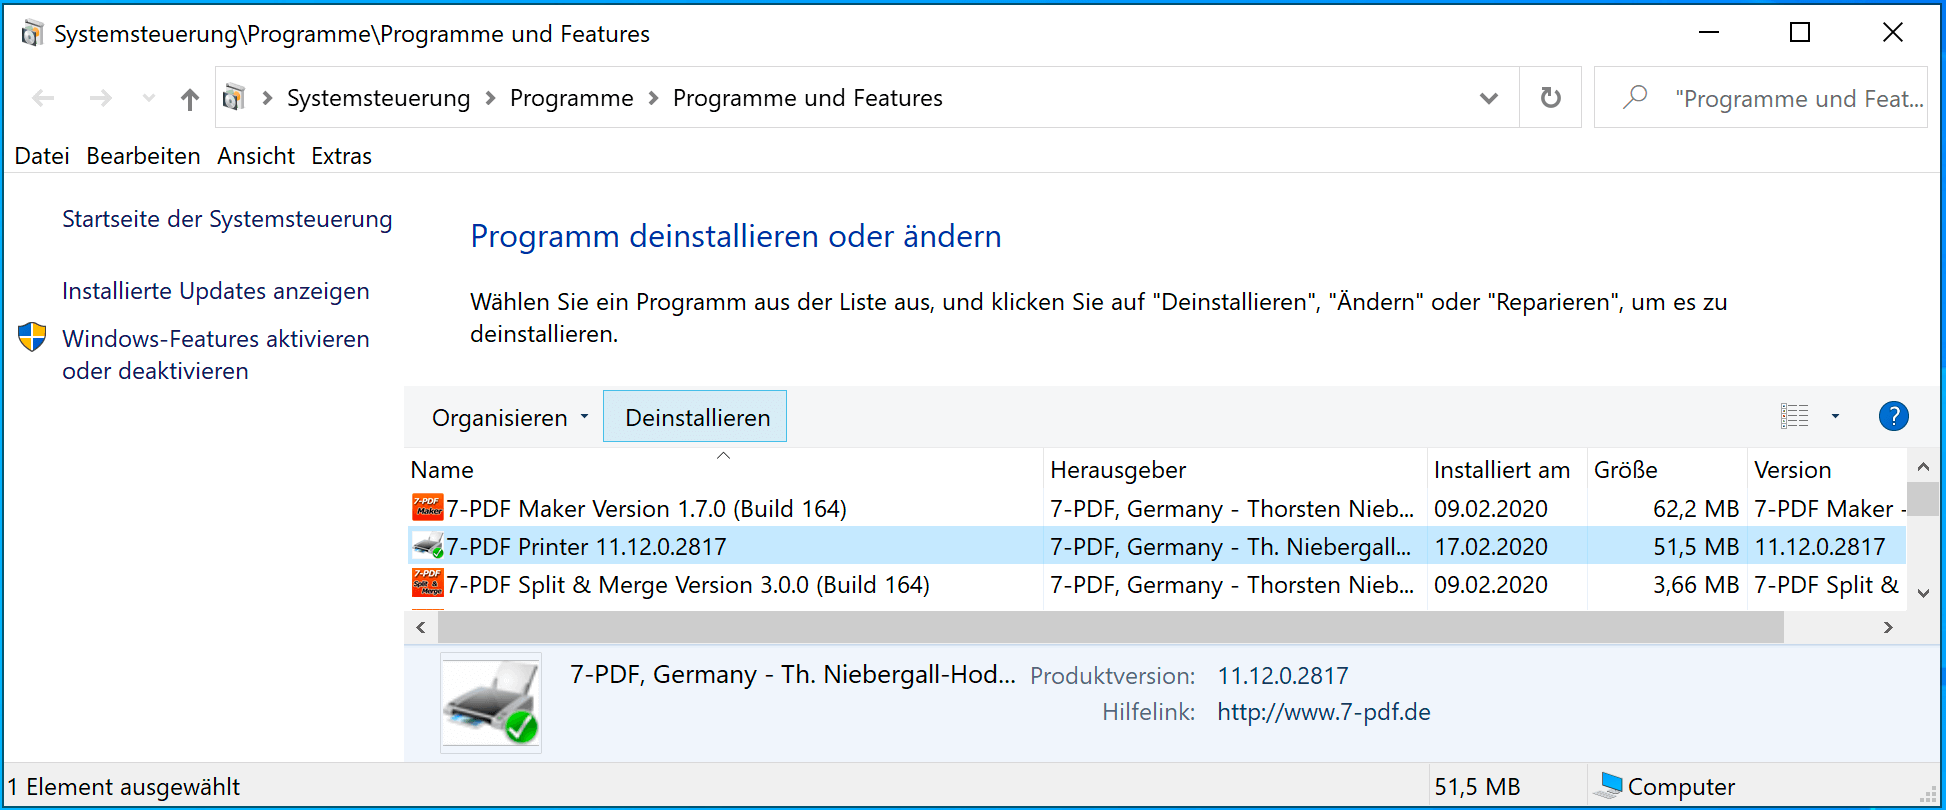
Another option is to delete the PDFCreator via the Control Panel via „Programs and Features“. You locate the PDFCreator entry in the list as shown in the screenshot, and then select the „Uninstall“ button that activates. This procedure, which is generally preferred, starts the uninstall program and cleanly deletes the PDF printer, here from Windows 10.

Illustration: Start PDFCreator deinstallation via the control panel -> „Programs and Features“.
You can find more information about our PDF printer on this Product detail page...
